What a backsplash actually has to survive
A backsplash is not wallpaper with grout. Behind the range it takes direct heat, grease mist and the steam of a stockpot rolling for hours; around the sink it takes constant water; behind a coffee station it takes daily wiping. That is why material performance differs so sharply by zone. Porcelain tile is fired dense and absorbs almost no water, which is why it shrugs off all three zones. Natural marble and other soft stones stain and etch in exactly the places a backsplash works hardest — beautiful on a dry bar wall, high-maintenance behind a range. Glazed ceramic sits in the middle: the glaze protects the face, but the edges and grout lines still need care. In the older colonials and split-levels we remodel across Rockville, there is one more job the backsplash quietly does: it covers the seam where new counters meet walls that are rarely perfectly flat, so the installation detail matters as much as the material.
Tile: ceramic, porcelain, glass and stone, honestly compared
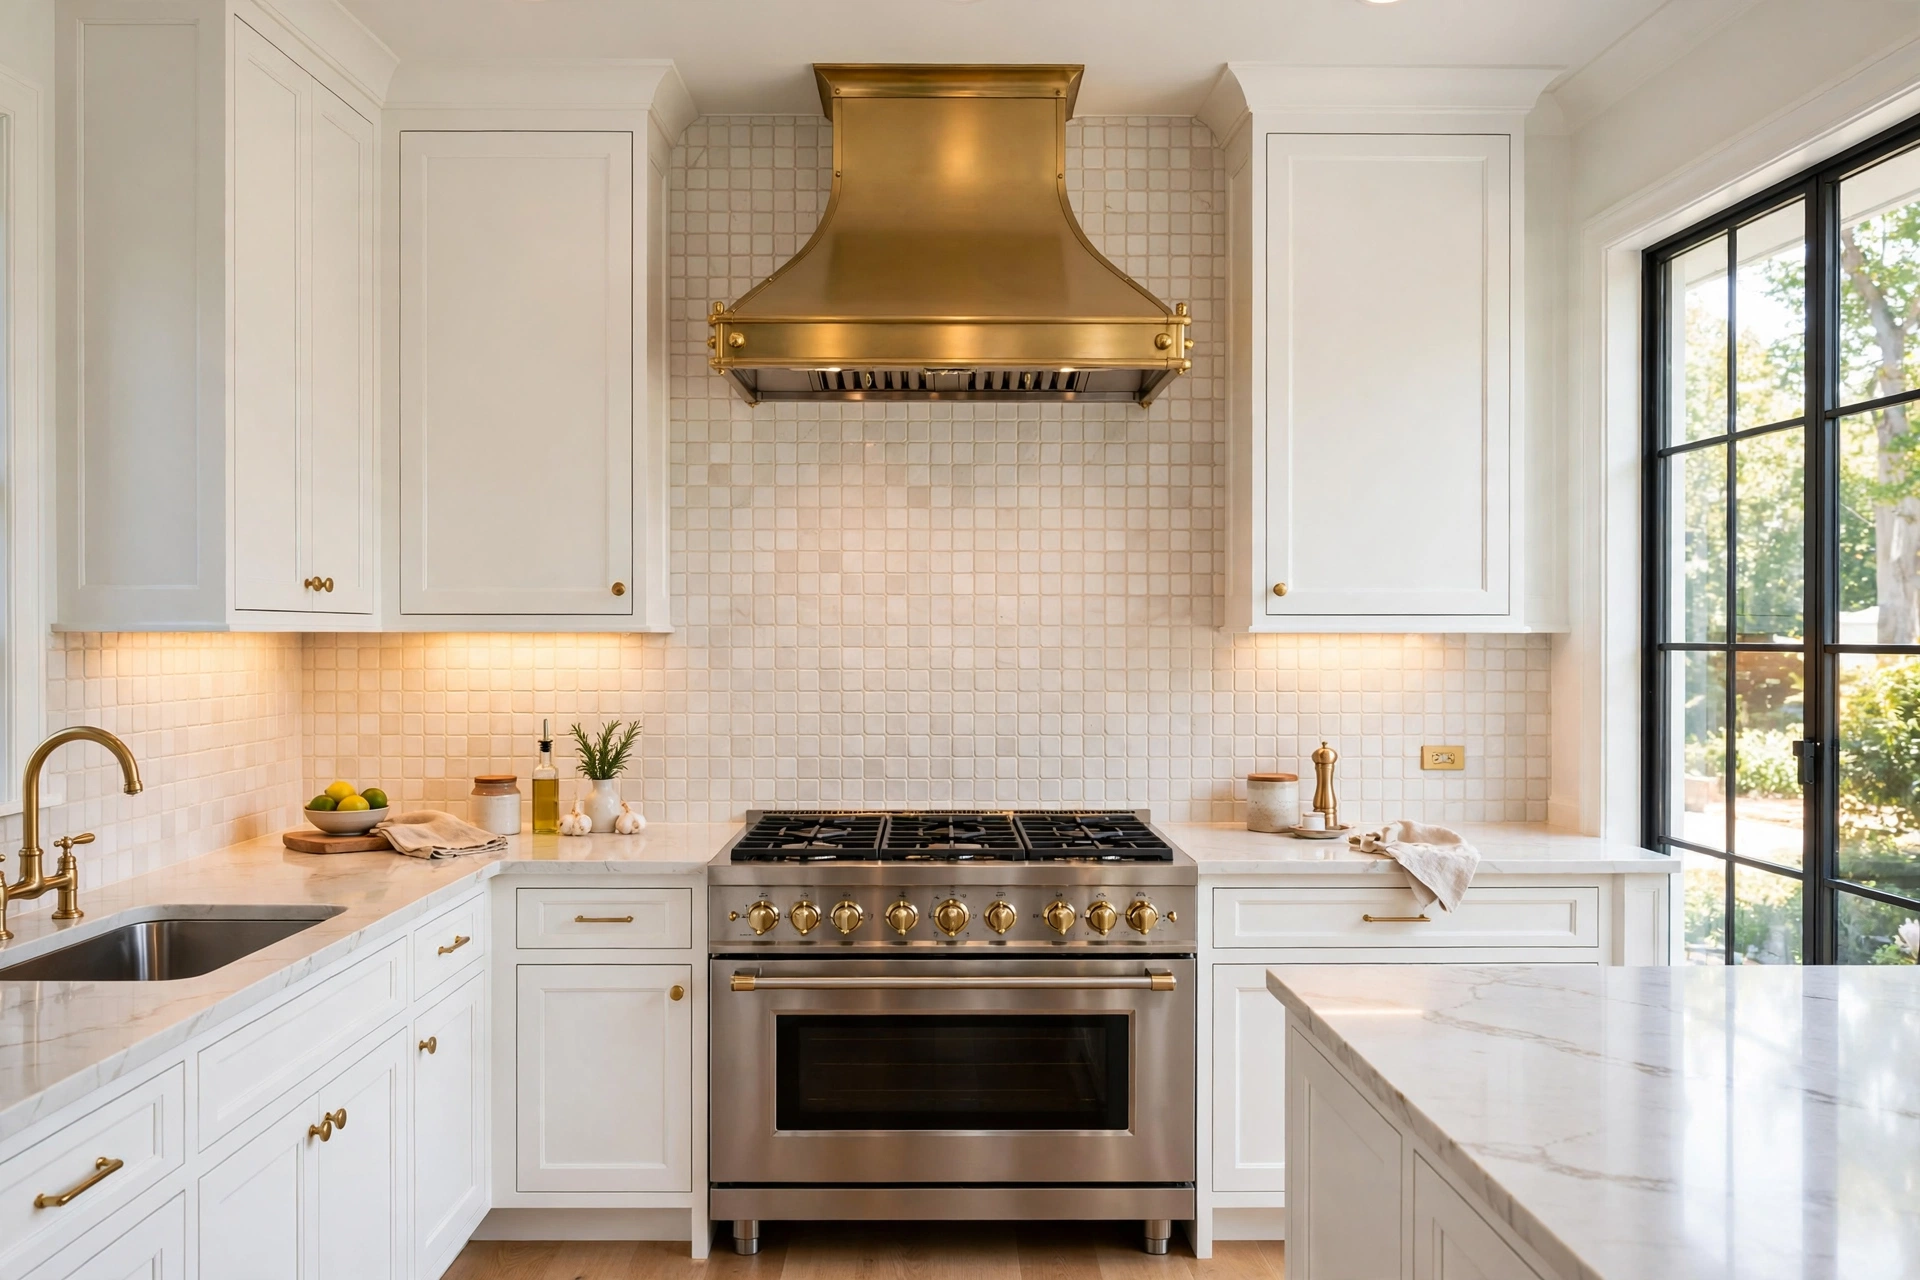
Tile remains the most flexible backsplash because size, pattern and price can all move independently. A classic subway tile in a running bond is the lowest-cost, most forgiving install — and laid in a stacked or herringbone pattern, the same tile reads completely differently, which is a design decision, not a budget one. Porcelain versions of that tile add density and edge consistency, so grout lines stay tighter and straighter. Glass tile brings depth and reflects under-cabinet light beautifully, but it shows every trowel mark through the tile and demands a skilled setter; budget the labor, not just the box price. Natural stone tile — marble, travertine, slate — carries real variation and needs sealing on schedule, and behind a range it will record your cooking history whether you want it to or not. Handmade-look ceramic with soft edges and glaze variation is currently the most forgiving middle ground we install: it hides minor wall unevenness, wipes clean, and suits both the traditional kitchens of Bethesda and cleaner modern layouts. Whatever the tile, order the overage: a discontinued dye lot cannot be matched later, and a spare box in the basement is the cheapest insurance in the whole kitchen.
Slab and panel backsplashes: seamless, striking, and templated
A slab backsplash runs the counter material — quartz, granite or sintered stone — straight up the wall to the cabinets or the ceiling. There is no grout to scrub and no pattern repeat to plan, and a dramatic stone becomes the entire room's artwork. The honest costs: the slab is templated and fabricated like a countertop, so it is priced like one; outlets and switches must be cut precisely or moved; and a future change means removing stone, not retiling a weekend project. Large-format porcelain panels and sintered sheets deliver a similar seamless read at a thinner profile and lower weight, which can matter on long walls, but they still need specialist handling — a panel cracked in transit or on the cut is a full replacement, not one tile swapped from the spare box. Glass and stainless panels suit a narrow set of modern kitchens and show wiping streaks and fingerprints honestly. Our rule of thumb: slab earns its price in a kitchen where the wall is the design; tile earns its keep everywhere else.
Grout, height and pattern: the decisions that decide the result
More backsplashes are ruined by grout than by tile. A light grout against a light tile reads calm and bright on day one and shows every splash of tomato sauce by month six; a mid-tone grout matched to the tile's shadow color ages far more gracefully. Narrow joints with a high-performance or epoxy grout cost a little more and repay it every time you wipe the wall. Height is the second quiet decision: counter-to-cabinet is the standard eighteen inches, but running tile to the ceiling behind a range hood turns a work zone into a feature, and stopping tile at a window or open shelf line needs a finished edge — a metal profile or a bullnose piece — planned before the first tile is set, not improvised after. Pattern is the third: herringbone and chevron multiply cuts and labor, a vertical stack modernizes a small kitchen, and a simple offset keeps the eye on the counters and cabinets. These choices belong in the same conversation as the kitchen cabinets and the counter edge, because the backsplash is where all three meet.
Where the backsplash sits in the remodel sequence
The backsplash is installed near the end of a kitchen remodel, and its timing explains most scheduling surprises. Cabinets go in first and are leveled; counters are templated on the finished cabinets and installed; only then is the backsplash set, grouted and sealed, because tile and slab both finish against the actual counter surface, not a drawing. Outlets are roughed in earlier but trimmed out after the backsplash, so the electrical plan — outlet spacing, under-cabinet lighting, switch locations — must be settled before tile day. Underfoot, the backsplash color should be checked against the flooring and the counter in your own light: a cool gray tile over warm oak floors can pull a whole room in two directions. Our kitchen cost breakdown shows where backsplash labor and material sit inside the total, and the pricing guide publishes the ranges we plan against.
Backsplash mistakes we are most often hired to fix
- White grout behind the range: it records every meal. Choose a mid-tone grout or a high-performance grout in the work zones and save bright white for dry walls.
- Unsealed natural stone: marble and travertine backsplashes that were never sealed stain permanently. If you choose stone, the sealing date goes in the project file.
- No spare tile saved: one cracked tile years later becomes a full-wall problem when the dye lot is gone. Keep a spare box from the original order.
- Outlets planned after tile: cutting finished tile for a moved outlet is slow, dusty and sometimes impossible invisibly. Lock the electrical layout before installation.
- Stopping tile with no finished edge: an exposed tile edge at a window or open wall looks unfinished forever. Plan the edge profile before the first tile is set.
A backsplash is the hardest-working wall in your kitchen — choose it for steam, splatter and daily wiping first, and it will still be the wall guests notice. Planning a kitchen in Maryland and want the backsplash, counters and cabinets decided once, together, in the right order? Call Eagle Home Improvements at (240) 266-8317 for a free in-home estimate, or use the lead form on this page with your preferred date and time. We will bring tile and slab samples to your table, talk honestly about grout and upkeep, and leave a fixed-price quote within 48 hours — MHIC #117311, with a 5-year workmanship warranty in writing.
Frequently asked questions
What is the most practical backsplash material for a Maryland kitchen?
Porcelain or glazed ceramic tile. It resists heat, steam and stains, wipes clean, and a single damaged tile can be replaced from a spare box. Natural stone needs sealing and records stains behind a range; slab is seamless but costs like a countertop.
Should backsplash grout be light or dark?
In work zones — behind the range and around the sink — a mid-tone grout matched to the tile's shadow color ages best and hides splatter. Bright white grout looks clean on day one and shows every meal within months.
How high should a kitchen backsplash go?
The standard is counter-to-cabinet, about eighteen inches. Running tile or slab to the ceiling behind a range hood creates a feature wall, and any exposed stop at a window or shelf needs a planned finished edge — a metal profile or bullnose piece.
When is the backsplash installed during a kitchen remodel?
Near the end: after cabinets are installed and leveled and after the countertops are in, because tile and slab finish against the actual counter surface. Outlets are roughed in earlier but trimmed out after the backsplash, so the electrical layout must be locked before tile day.